When it comes to keeping your home clean, air duct covers are often overlooked. These essential components of your ventilation system help circulate air throughout your space, but over time, they can accumulate dust, dirt, and even allergens. Cleaning them is vital for the efficiency of your HVAC system and the overall indoor air quality of your home. This guide will show you how to clean your air duct covers effectively, improving both air duct maintenance and system efficiency.
Why You Should Clean Air Duct Covers?
Air duct covers are frequently forgotten in routine cleaning. However, they play a critical role in maintaining a healthy indoor environment. If dust, dirt, and allergens build up on the vent covers, it can lead to:
Reduced Airflow: Excessive dust or debris can block airflow, making it harder for your HVAC system to properly circulate air.
Poor Indoor Air Quality: Dust, allergens, and dirt can get released back into your home, lowering indoor air quality and potentially causing respiratory issues.
Unpleasant Odors: Trapped dirt can produce odors, especially if moisture accumulates in the ducts, potentially leading to mold growth.
Cleaning your air duct covers helps maintain better airflow, improves indoor air quality, and ensures that your HVAC system runs efficiently, saving you energy costs and contributing to overall energy efficiency.
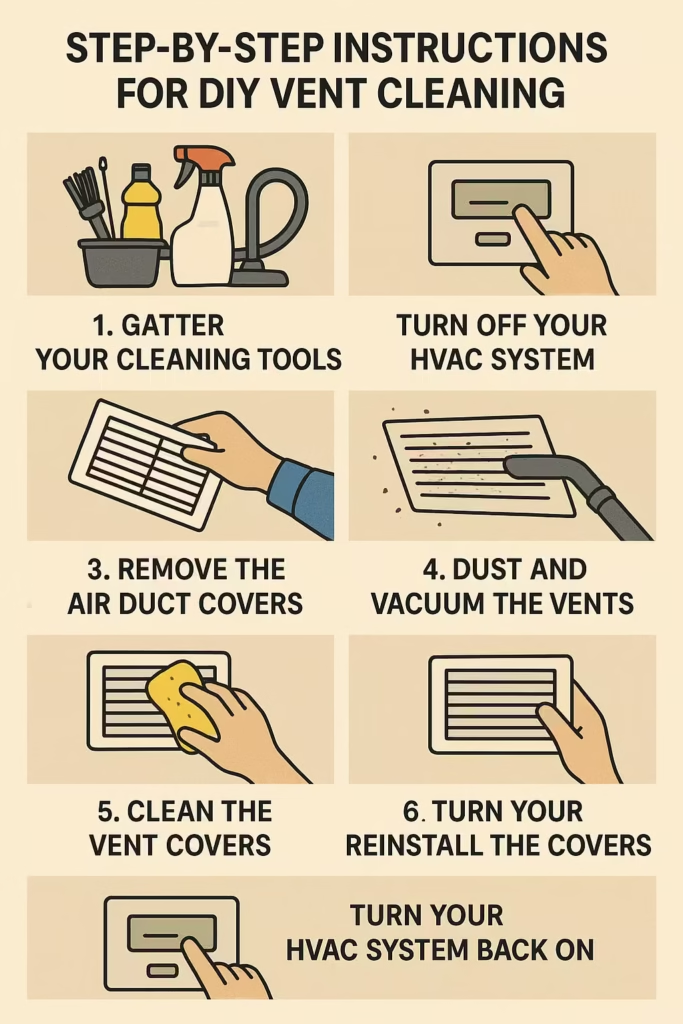
Step-by-Step Instructions for DIY Vent Cleaning
Here’s a simple, step-by-step process for air duct cleaning:
Step 1: Gather Your Cleaning Tools
Before you begin, make sure you have the following items on hand:
- Screwdriver (for removing the vent covers)
- Microfiber Cloth (for wiping down the vents)
- Vacuum Cleaner with Hose Attachment (to vacuum dust from the vents)
- Mild Cleaning Solution (to clean and disinfect)
- Duster or Small Brush (to clean hard-to-reach areas)
Step 2: Turn Off Your HVAC System
It’s important to turn off your HVAC system before starting the cleaning procedures. This prevents dust from circulating through your home while you clean and ensures that your air handling unit is not accidentally damaged during the process.
Step 3: Remove the Air Duct Covers
Use a screwdriver to gently remove the air duct covers from the wall, floor, or ceiling. Some vent covers are screwed in, while others might be clipped in place. Handle them carefully to avoid bending or damaging the cover.
Step 4: Dust and Vacuum the Vents
After you’ve removed the covers, use a duster or small brush to remove any visible dust and debris. Follow up by using the vacuum cleaner’s hose attachment to clean inside the duct and around the edges of the cover. This step helps remove dust mites, mold spores, and other airborne contaminants.
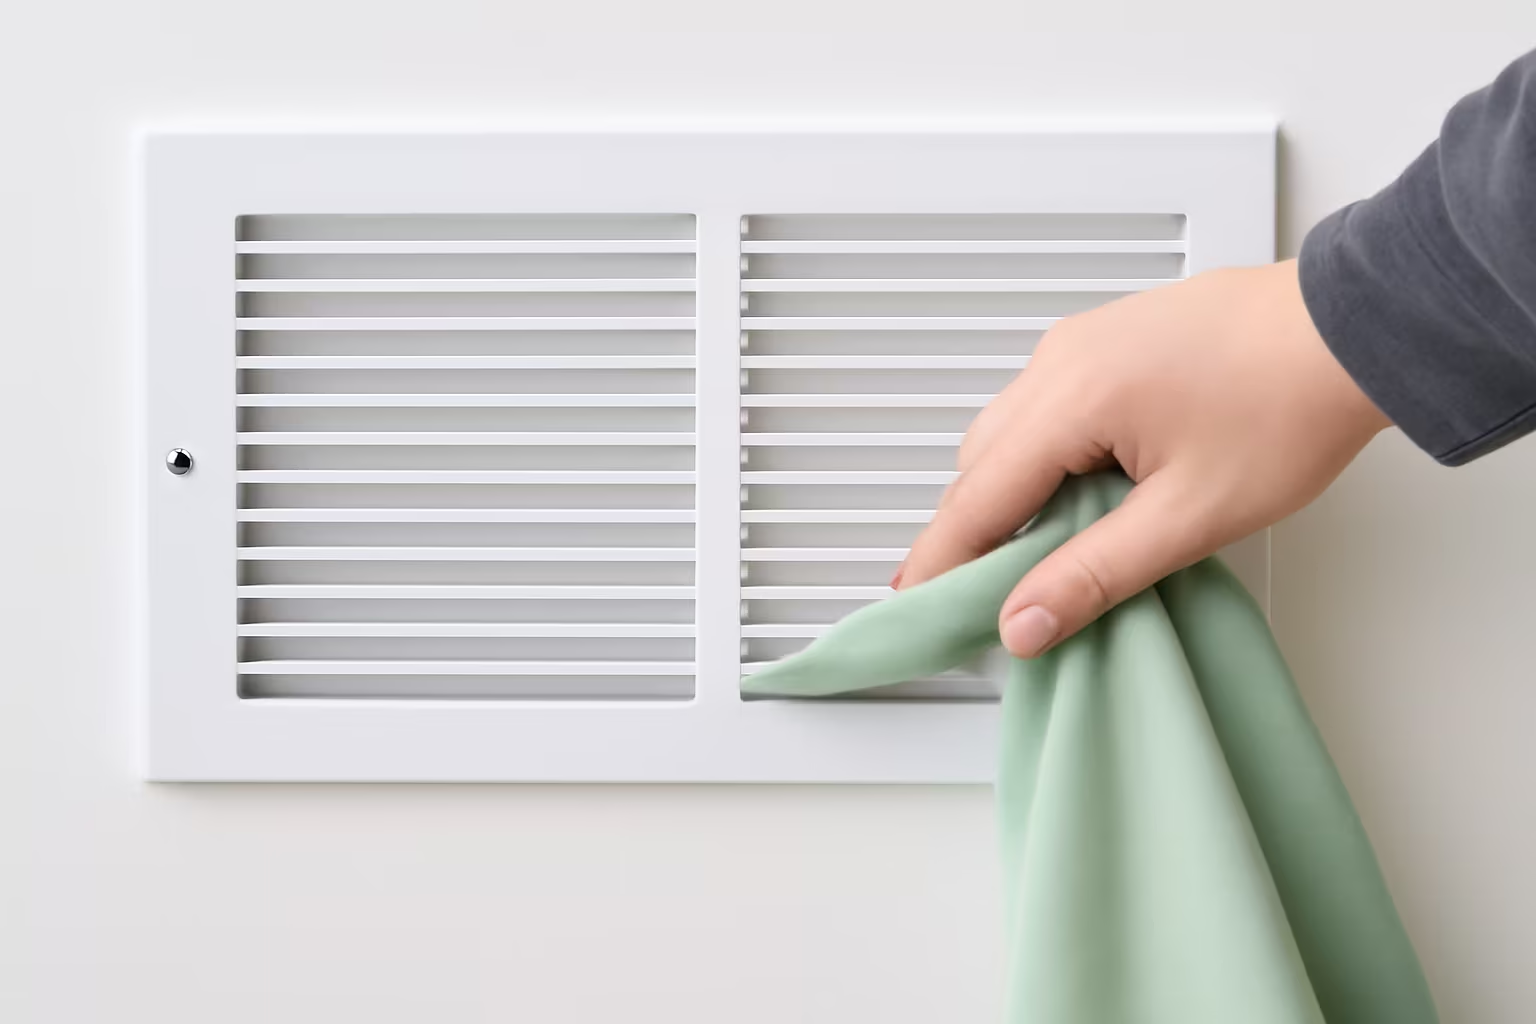
Step 5: Clean the Vent Covers
Once the dust is cleared away, dampen a microfiber cloth with your cleaning solution (be sure it’s not too wet) and wipe down the air duct covers. If the covers are particularly dirty, you can soak them in warm, soapy water for a few minutes. After soaking, scrub them gently with a soft brush.
Step 6: Dry and Reinstall the Covers
Once the vent covers are clean, dry them thoroughly with a clean microfiber cloth before reinstalling them. It’s important to ensure the covers are completely dry to avoid trapping moisture, which can lead to mold growth or other moisture issues.
Step 7: Turn Your HVAC System Back On
After you’ve reinstalled the vent covers, turn your HVAC system back on. Let the air circulate through the vents for a few minutes to ensure everything is working properly and to check for any unusual odors that might indicate the need for further cleaning.
How Often Should You Clean Your Air Duct Covers?
The frequency of cleaning your air duct covers depends on factors such as dust levels in your home, whether you have pets, and the general air quality in your area. However, a good rule of thumb is to clean your air duct covers at least once every three to six months. If you notice that dust is accumulating faster than usual, or if someone in your household has allergies or asthma triggers, it may be worth cleaning the vents more frequently as part of your regular HVAC maintenance routine.
Tips for Keeping Air Duct Covers Clean
Here are some additional tips to help keep your air duct covers cleaner for longer:
- Use high-quality air filters: They trap dust and allergens before they enter the ducts, reducing the amount of debris inside.
- Vacuum and dust regularly: Frequent cleaning helps prevent dust accumulation on the vent covers.
- Check for duct leaks: Occasionally inspect your air ducts for any leaks or blockages that could contribute to dust buildup.
- Consider using an air purifier: In high-traffic or allergy-prone areas, an air purifier with a HEPA filter can help reduce the amount of dust that enters your vents.
Benefits of Clean Air Duct Covers
There are several key benefits to keeping your air duct covers clean:
- Improved Indoor Air Quality: Regular cleaning removes dust and allergens that could impact your respiratory health.
- Better Airflow: Clean vents allow your HVAC system to run more efficiently, ensuring that air circulates properly throughout your home.
- Energy Savings: An efficient HVAC system uses less energy, which can help lower your energy bills and improve overall energy efficiency.
- Fewer Allergens: For households with allergy sufferers, clean vents prevent dust, pet dander, and pollen from circulating throughout the home, potentially reducing allergy symptoms.
Final Thoughts
Cleaning air duct covers may not be the most exciting task, but it’s an important one for both the cleanliness of your home and the efficiency of your HVAC system. By following these simple DIY vent cleaning procedures, you can maintain your air ducts and enjoy a fresher, healthier living environment. So, roll up your sleeves and get to work. With just a little effort, you’ll improve both your home’s indoor air quality and your HVAC system’s performance.
Remember, while these steps can help maintain your air duct system, if you notice persistent air quality problems or suspect more serious issues like extensive mold growth or severe duct contamination, it may be time to consider professional duct cleaning services. An HVAC technician can provide a thorough inspection and cleaning of your entire ventilation system, including hard-to-reach areas like the return air plenum and supply air plenum, ensuring optimal performance and air quality for your home.